
Concrete Preparation for Epoxy Flooring
Whichever epoxy or polyaspartic coating you choose, the slab under it gets a big vote in how it turns out. The conditions behind a strong bond are settled ahead of any mixing: the profiling the surface received, any flaw repair done beforehand and the verdict of moisture testing. Together, those set the coating’s starting point.

The Short Answer
Three kinds of work get a slab ready for coating. Mechanical profiling scuffs up the concrete enough for the coating to dig in instead of just resting there. Crack, chip and void repair clears out weak spots before any product touches the floor. Moisture testing puts measured readings in your installer's hands for choosing products, replacing guesswork. How much effort each one needs comes down to what the floor shows during an on-site assessment.
The Three Essential Steps
What the concrete goes through before a single coat is applied.
01
Cleaning & Grinding
Step one opens the concrete by mechanical means. With diamond grinding, abrasive tooling sweeps over the slab, shaving away the top skin to reveal a coarse, porous face for the coating to anchor in. Shot blasting instead propels steel media against the surface and gets a similar texture through impact instead of cutting. Your installer chooses one or the other based on how the slab looks and what the product’s data sheet demands. Acid etching used to be routine, but modern epoxy and polyaspartic systems have largely moved past it in favor of mechanical methods.
02
Crack & Surface Repairs
Where coating spans an open crack or void, it grabs the concrete along both edges while bridging empty space between them. That unsupported strip becomes a soft spot. Foot and tire traffic plus temperature swings keep working on it, and the defect may eventually ghost through the finish. Repairing every chip, void and crack beforehand takes those soft spots off the table. Our guide to fixing coated floors explains the handling of each defect type.
03
Moisture Testing & Inspection
Concrete breathes. Moisture from the soil wicks up through it, and on a bare slab that vapor simply escapes. Cap the surface with a coating, though, and that vapor is stuck right where slab and coating meet. Pressure mounts at that boundary and can loosen the bond, which reveals itself as blisters, bubbles or peeling patches. Testing vapor levels before choosing a product hands your installer solid facts for choosing a product and for judging if moisture control deserves a place in the plan.
How Does Grinding Improve Adhesion?
Epoxy and polyaspartic stay put by mechanically clutching a rough, open surface. Unprofiled concrete, be it sealed, polished or untouched since the finishers walked away, can look ready yet give the coating close to nothing to grab.
In professional prep, two mechanical approaches dominate. Diamond grinding runs abrasive heads across the slab, planing off the surface layer and bringing the coarse stone in the mix to the top for a rough, open finish. Shot blasting pelts the concrete with steel shot and creates a comparable profile by impact. Both leave a face the coating can lock onto, and the right pick for any given job hinges on the slab and the product specs.
Target depth for the profile isn’t one number; it shifts depending on the coating and on how the slab looks. Your installer fixes it only after evaluating the floor, before any machine starts up.
Should Cracks Be Repaired First?
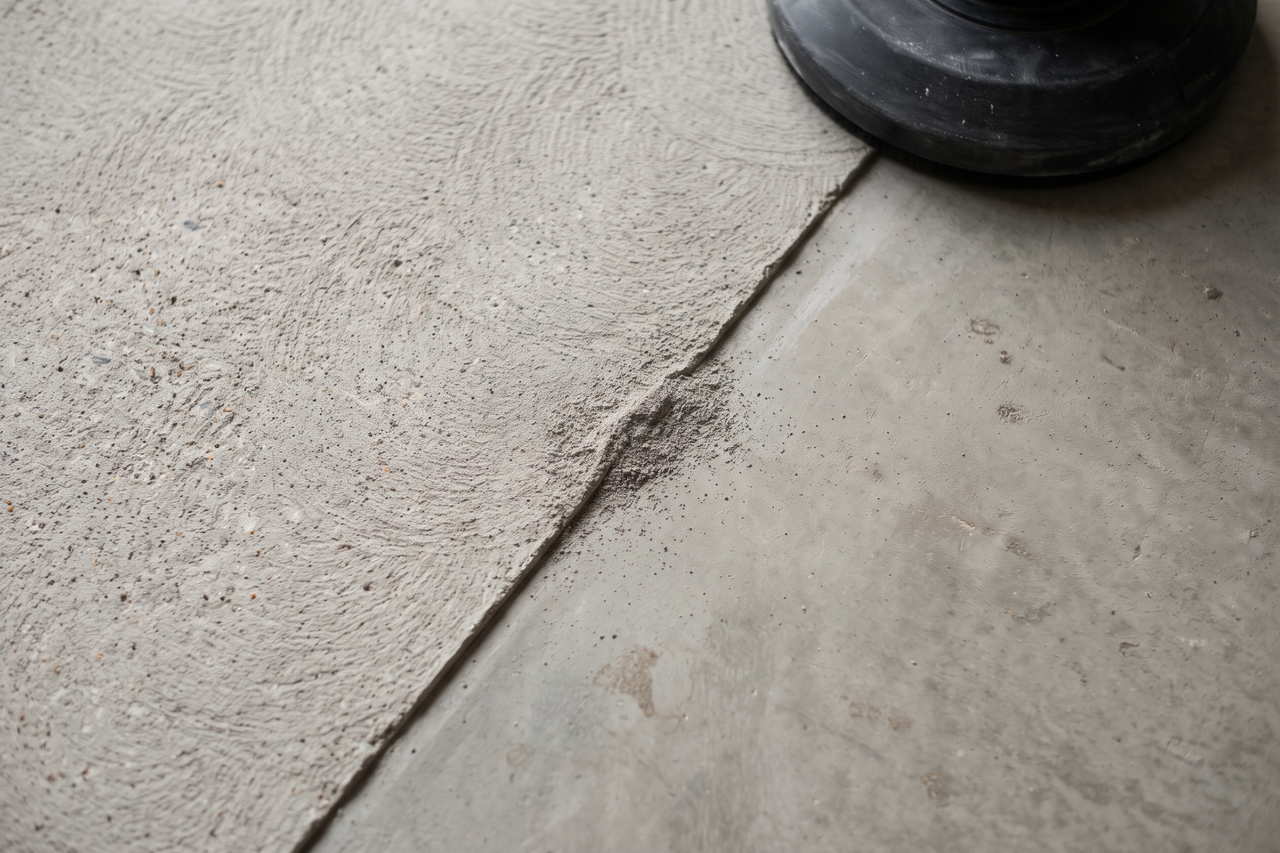
Why repair first? Coating poured across an open crack grips both lips of it yet nothing in the middle, leaving it suspended over a gap with no solid concrete beneath. Daily loads and thermal shifts pile stress onto that unsupported span, and sooner or later the crack can surface in the finish.
The correct fix depends on why the crack formed. A fine crack that has stayed stable gets handled as ordinary prep. Cracks that are still on the move, slice deep into the slab or trace a pattern pointing to structural loads or settling are a separate conversation, and the force behind that movement should be figured out before anyone settles on a repair product.
Our page on bringing damaged coatings back explains how common crack types are judged and what responses suit each.
Why Is Moisture Testing Important?
Ground beneath a slab is rarely bone-dry. Vapor migrates up through the concrete, and once it bumps into a sealed coating it has no exit. Pressure builds at the interface and shoves upward against the bond; bubbles, blisters or whole sections letting go of the slab are the visible result.
Taking moisture readings before choosing products roots those choices in evidence. Coatings tolerate high vapor differently, and where readings come in high, a primer built for moisture mitigation may be wise beneath the primary coating, a step justified by numbers rather than hunches.
Selecting products without moisture data means betting on assumptions. If the bet goes wrong, moisture becomes a recurring factor in early coating failures, right alongside preparation, product selection and installation conditions.
Can Epoxy Go Over Painted or Previously Coated Concrete?
Laying fresh coating over an existing layer starts with three questions: what that layer is, how well it’s holding on and whether the old and new chemistries are compatible.
An old coating that’s already letting go, curling along its edges, blistering, or flaking when scraped with a fingernail, is no foundation. New material over a failing layer simply inherits the adhesion problem instead of curing it.
Where the current layer is soundly bonded and the products prove compatible, a recoat over it might be feasible. Pinning down everything that’s on the concrete is one job of the prep assessment.
How Should You Prepare Your Garage Before the Contractor Arrives?
Profiling, repairs and moisture testing fall to the flooring professional. Your most helpful contribution is clearing the room and making a few notes about the floor that could sharpen the evaluation.
Your garage to-do list:
- Clear out cars, shelving, bins, tools and whatever else is parked on the slab so every square foot can be reached.
- Jot down moisture hints you’ve spotted, like puddles that appear after a downpour, white chalky crust or spots that feel spongy underfoot. Those clues point the assessment in the right direction.
- If the slab carries an old paint or coating, share any detail about it, however sketchy.
- Before the job starts, ask how the work will be phased and how the room eventually gets handed back for normal use.
To follow the full coating process step by step, from slab work to the finished surface, take a look at our walkthrough of a coating installation.
Frequently Asked Questions About Concrete Preparation
How much does prep work influence the finished coating?
Enormously. Preparation is often part of the problem when a coating fails early, alongside moisture, product choice and installation conditions. Skip thorough profiling, cleaning and repair, and the coating misses out on the mechanical grip it relies on. Careful prep, by contrast, gives a better foundation for long-term performance.
Do all slabs need the same preparation?
Not even close. Compare a slab without old coatings, barely contaminated and reading normal for moisture against one wrestling with all three complications; the work involved differs a great deal. Your installer shapes the prep plan around what that particular floor shows, not a template.
Is a slab with multiple cracks a concern?
Count matters less than character. Stable hairlines usually get absorbed into routine prep with little added scope. Ones that appear active, travel deep or track along load or settling patterns each need a closer look before anyone chooses a repair material.
How does acid etching compare with grinding?
Where current pro-grade epoxy and polyaspartic products are concerned, grinding is the accepted approach, while etching is viewed as less consistent. Acid gives a patchier profile and leaves residue needing complete neutralizing and removal before coating. Your installer picks whichever method suits both the slab and the product.
What curing period does fresh concrete need before coating?
People often cite a figure of roughly 28 days for fresh concrete to cure ahead of coating; treat it as a general guideline and not a hard rule. Real readiness rests on the mix design, the curing temperatures and the specific coating product. Before preparation begins, your installer confirms the concrete is ready.
My slab tested high for moisture. What happens now?
Elevated numbers shrink the pool of products that make sense, yet coating usually remains possible. The readings steer your installer’s product choices, and when vapor is especially high, a moisture-mitigating primer may be advised as the first layer, backed by what the test data shows.
Ready to Get a Quote for Your Concrete Floor in Storm Lake, IA?
Your slab has a story of its own. Describe where it stands today to request a customized estimate.